
A city NOC dashboard consumes Meraki and DNA Center data. Meraki returns 5xx while DNA Center is healthy. Which design response is appropriate?
Select an answer to reveal the explanation.
Short Explanation
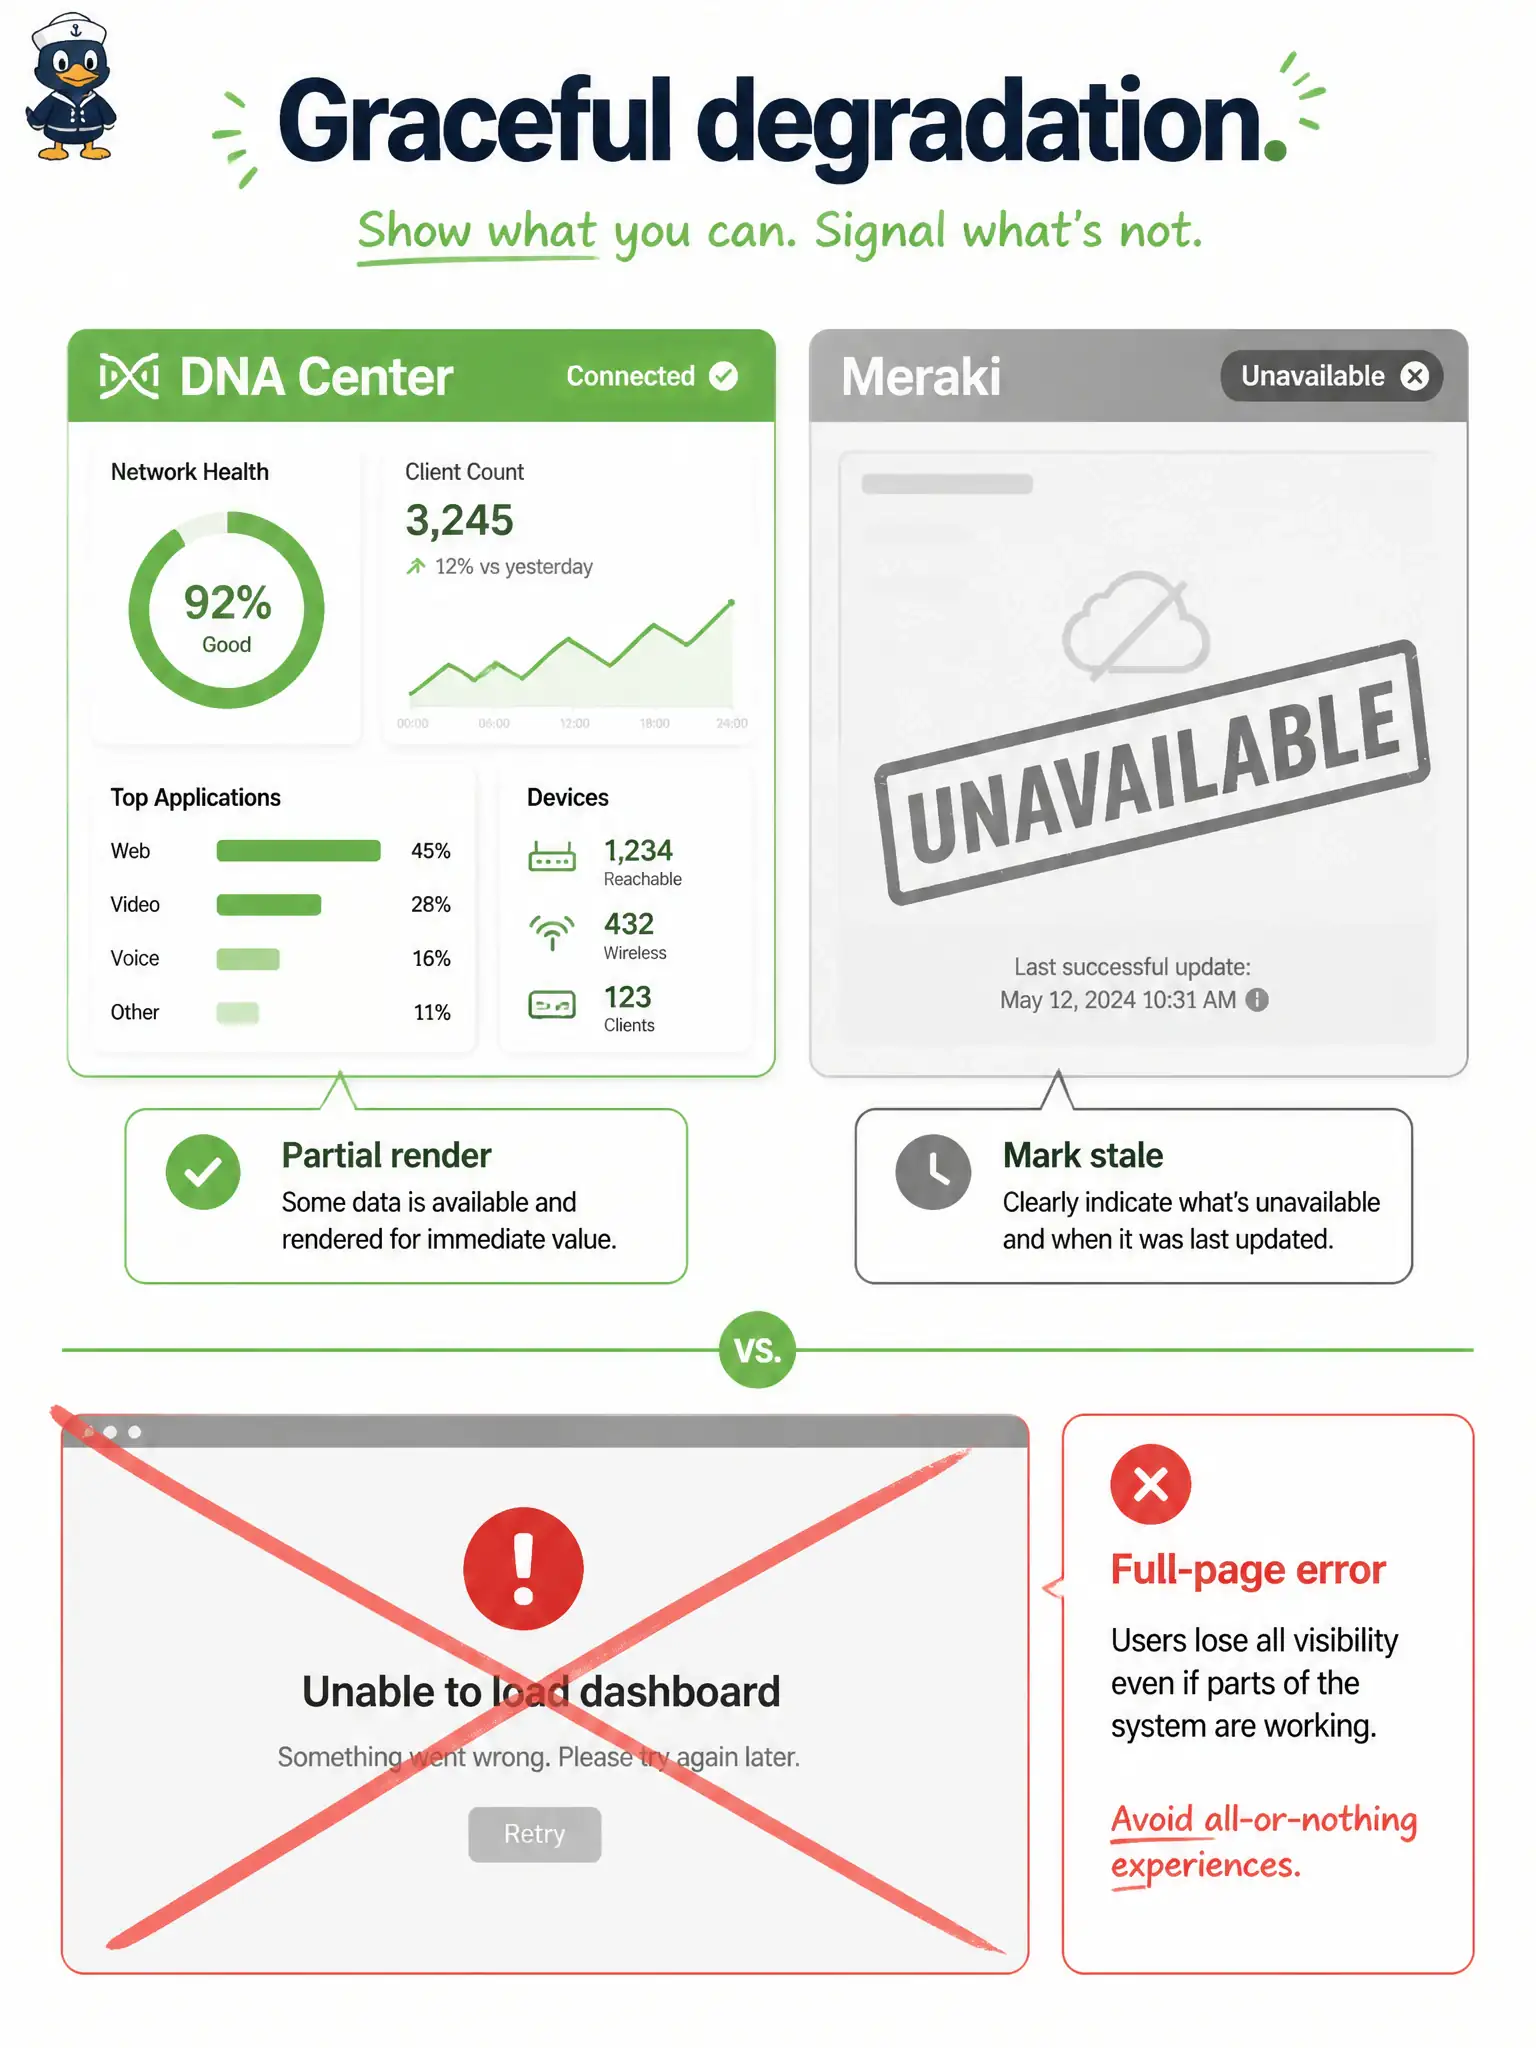
If one weather station goes dark, you still show the working gauges and flag the missing one. Partial availability beats all-or-nothing page failure. Failing the whole dashboard for one 5xx is the anti-pattern.
Full Explanation
Partial availability is the right response when Meraki returns 5xx while DNA Center remains healthy on a city NOC dashboard. Render the healthy DNA Center view and mark the Meraki panel stale or unavailable so operators keep working with what is known. Isolating failure to the bad hop preserves situational awareness instead of amplifying one platform outage into a total dashboard blackout.
Blanking the entire page until both APIs return 200 fails by coupling independent data sources into one all-or-nothing render. Retrying the failed hop in a tight loop on the request thread fails by burning latency budget, risking thundering herds, and still blocking healthy panels. Disabling DNA Center panels whenever Meraki fails fails by inventing a false dependency and removing good data to create a uniform empty state.
Exam caveat: mark staleness with timestamps and limits on retry backoff; silent success with old Meraki data can mislead incident response if freshness is not shown.
Operational check: inject Meraki 5xx in a staging facade and confirm DNA Center widgets still render with an explicit Meraki unavailable or stale indicator and no full-page error.
Partial render also reduces incident noise: NOC staff keep DNA Center wireless context while Meraki recovery proceeds. Pair the stale marker with a bounded background refresh so the panel recovers without a full page reload. All-or-nothing dashboards hide which platform actually failed and slow municipal response.